Wednesday, October 31, 2012

My grandson Jax's 1st Birthday invitation

Good morning, Faithful Followers!

I am leaving in the morning for a fun-filled visit to celebrate my youngest grandson, Jackson's first birthday! I thought that my daughter-in-law was so creative in making his invitations to his birthday party. The theme is Dr. Suess. She decided to make 3 different invitations with 3 different characters. She wrote the poem herself. I thought that it was so creative. She did admit that my son helped with one line that she was stuck on! LOL! You will notice that on the poem part, I deleted the address, thus creating a rectangular hole! I tried to upload the poem close up, but the server is not letting me. I will try again later.


ADORABLE, right?! 

Thanks for visiting me today!
                    Hugs!
                    Deb

Monday, October 29, 2012

 Hello Faithful Followers!

I decided to first tell you about my new Scentsy business! I am SO excited about it. It's such a wonderful company, and I am enjoying being a part of it already. If you want to check out my website, you can go to https://DebAlderson.scentsy.us 

Orders can be placed from my website. You can also have a basket party, which is a book party. I can give you samples of the different scents, so that your friends and family can see what scents they like. You can then receive 1/2 off items and free items too! Let me know if you would like to host. You don't have to live near me or even know me personally to have a basket party! Don't miss out on all of the wonderful warmers and bars, as well as the other items that Scentsy has to offer!


Now, onto today's project. Today I am sharing a cross that I made for a gift. This is the second one that I have made. I plan to make another one for a gift. They are made from wood. The crosses were pre-cut by a gentleman on eBay. He sells them at a reasonable cost. If you are interested, contact me for more info. You also need card stock, paint and tin. You will also need an embossing folder to emboss the tin. This cross is approximately 15" tall. Each layer is done separately. The bottom layer was painted, then using a paper pattern, cardstock was cut to fit inside of the largest cross to highlight the base. The next layer is painted. The next layer is covered with tin that was embossed, then was sanded to highlight the embossing. The last piece was painted and I added a little bling to it. It was the finishing touch! I hope you like it!
Hugs to all! Have a great day!
Deb

Wednesday, October 17, 2012

Christmas cards

Good morning, Faithful Followers!Today I am sharing 2 Christmas cards that I created for a customer. All of the cards that I create for her are one of a kind and are themed specially for her family and friends. The first card is a Christmas Tree that I stamped and then added a little bling to. I stamped it, then cut it out using a Spellbinders die. The edges are inked. To add more interest to the card, I used another die that is square rather than oval beneath the oval, which I also inked the edges. I added ribbon and a bow around the bottom of the card and mounted it onto card stock.

 My next card is Santa water skiing! I used Copic markers to color and outline the image. I added Stickles to the beard and hat for a little bling. I used a Cuttlebug folder to emboss the background of the card.

We had a small earthquake here in north Texas last night. It was only a 2.7, but reminded me that I really enjoy the earth being solid beneath my feet! Today is sunny and windy. It is going to be in the 80's, then drop to the 70's later on. Crazy weather! I guess that everyone around the country can say the same.

Have a great day!

                                        Hugs!
                                        Deb

Saturday, October 13, 2012

Fall is here, but where are the cooler temps?!

Good morning Faithful Followers!
I know that you have been waiting for a new post. I have been so busy. I was in MA for a wedding for a few days recently. When I cam home, I started working on my new Scentsy business! I am going to add my link here and hope that you will consider ordering!

My card today is a sympathy card for a friend who lost her father this week. It's a simple card to make. I first stamped my tree. I then made the hazy sun using a template that I made, cutting a circle out of a piece of card stock. I used several inks to get the affect I was looking for. I inked my background using 2 shades of orange, and a brown for the ground. I use a sponge to make this affect. 
I stamped my sentiment, then cut it out with a punch, and inked my edges.
I added brown pearls, then mounted the card front onto my folded card.

With the exception of the pearls, I used all Stampin' Up! products to make this card.

I hope that you have a wonderful weekend! Enjoy this day! Every day is a gift!

Hugs!
Deb

Sunday, September 30, 2012

A Birthday card

Good Sunday morning, Faithful Followers!

I hope that you have been enjoying your weekend. I don't know how the weather is where you live, but here in Texas, we have had a very rainy weekend, which is very welcome. It isn't very motivating though! 

Today I am sharing a card that I made for my Dad. I think that most of us struggle with making masculine cards. Although, I have found that the trick is to know what a person really loves, whether it is for a male or female. I really think that makes the card. I think that my favorite thing to do is to make cards for people that I know what they love and are passionate about. It makes my creative juices flow!

So, on with today's card. This stamp is from Rubbernecker and is a  T-Bird convertible. My Dad loves cars, always has. In fact, when I was growing up, we lived about an hour from my maternal grandparents. My grandparents never knew what car to look for when we would visit, because we had a different car almost every time we visited! He just loved cars so much. He has never lost that passion. So, when I started thinking about his birthday, I remembered that I had bought several car stamps from Rubbernecker when I attended a stamping convention. Since my Dad lives in Florida, I gave the card a tropical flair!

Rubbernecker T-Bird Convertible Birthday card


I started out by coloring the car with Copic  and Stampin' Up! markers. I used both, mainly because I didn't have enough of a variety in orange. I also used a silver pen on the "chrome" parts of the car. I then used some Diamond Glaze on the orange "paint" part of the car. After letting it dry, I cut it out. Using white 
card stock, I drew a line to resemble a road, then added the sun. I inked the background for both the sky and the road. I had a cute glittered palm tree in my stash, which I added to the side of the road. I wanted the car to really stand out, so I used pop dots to raise it and give it dimension. As I looked at the card, I thought that it needed something more to make it into a birthday card. I remembered that I had a Stampin' Up! set that had all kinds of things to add to the back of a truck or car. When I found the balloons, I knew that they were what I was looking for. I stamped that directly onto the white card stock, then colored the balloons. I mounted the design onto orange card stock to coordinate with the car. To complete the card, I stamped Happy Birthday and then punched it out, inking the edges with the same orange used on my car. And...voila!

I hope you enjoy today's card! Have a wonderful Sunday.

Hugs!
Deb

Saturday, September 29, 2012

Rainy Saturday

Good morning, Faithful Followers!

It's a rainy Saturday morning here. You would think that with the sound of the rain softly landing on the roof, it would make me sleep. But, here I am at 6:00 AM. Oh well, I guess that I was anxious to come on here and share with you!

I have been busy in my studio this week. I have been trying to get cards made before I go to an upcoming wedding out of town. I wanted to be sure that the "beginning of the month birthdays" are not belated! So often, I get behind with those early month birthdays. They seem to just sneak up on me.

Today I am sharing another wedding card with you. I was inspired by another card that I saw online. I played around with it for quite awhile. I finally was able to get the look I was going for.

My first challenge was to decide what size to make the hearts. I punched out larger ones to begin with, but they were too big. They look up too much space on the card. I wanted to have rows that were full and equal. I used my Creative Memories heart punch that I have had since it came out and I was a Creative Memories Consultant...a long time ago! They have 2 sizes on each punch. So, there's no guess work in matching the sizes to one another.

Next, I took the smallest of the hearts and put them onto an embossing folder and ran them through my Cuttlebug to give them texture. After that, I layered them onto the larger hearts, put them in rows and attached them to the card. To make them pop a little more, I added some pearls to the center of each one.

ONce my hearts were made, I cut out the "I DO" on my Cricut using the Ashlyn's ABCs cartridge. I cut them out in white cardstock too, and didn't like how it faded into the card itself, so I attached it to the center, between the hearts, and decided to add some Stickles for color, texture and dimension. Now, I would like to tell you that it was as simple as that. But, any cardmaker or scrapbook maker knows, it's not that simple! I tried many other options before finally deciding to go with this look. I am SO happy that I didn't give up! 

Have a great day and be creative, my friends!

Hugs!
Deb

Wednesday, September 26, 2012

It's Hump Day!

Happy Hump Day, Faithful Followers!

It's time to put my best foot forward and start working on gifts for Christmas. I am determined to make gifts this year. I have some great ideas that I have come up with, as well as those from Pinterest. Are you addicted yet? Pinterest is stirring up some creative juices in me, as well as some pretty darn good meals!

It's Hump Day! I thought that I would share a picture of my adorable grandson             to help make you smile today! But, don't worry, I am sharing cards with you too!

Bobby
Wedding card
I am beginning with a card that I made for my daughter's best friend and her husband-to-be. Hopefully, she won't be checking out my blog before the wedding a week from Saturday! I got the idea from a card that I saw on Pinterest, but made it my own.

I have to say that it was challenging to make a card freehand, as I am not an artist by any means.But, I cut out the bride's dress freehand and put it through my Cuttlebug. I added it on top of my card, which I had attached a piece of black cardstock from a mat stack. I then cut out a little shirt, bow tie, flower and lapel freehand. I added some black pearls as buttons, and a pearl for the inside of the flower, then attached the whole piece just above the top of the card, to make the groom appear to be taller than the bride. I had a string of pearl type beads, which I added as the bride's waistband, along with a flower with a pearl center. 

After I finished with the basic card, I thought that it still needed something. So, I went into my stash and found a piece of tulle to make a veil. I had to strategically tuck it behind the front of the card. I added a piece of card stock to cover the backside of the front, and added a journaling box made from a Spellbinders die.

I am hoping that my special bride receiving this card loves it! I hope that you enjoy it too!

Have a wonderful day!
Hugs!
Deb 


Sunday, September 23, 2012

Happy Fall...a day late!

Good morning, Faithful Followers!

I forgot to that yesterday was the first day of Fall, until I had already posted my blog. So, Happy Fall! It's hard to believe that it's here, yet I am SO ready to move on from Summer. Summer in the Texas heat is no picnic...it's even too hot to have picnics!


Today I am sharing another card that was made for one of my favorite customers! She has a friend who loves lighthouses. She needed a Christmas card for her. So, I thought, how can I make a lighthouse look like a Christmas card? Ta da! Add one of my favorite blings to it...Stickles! I drew my "electrical cord" around and down the lighthouse, then added red and green dots of Stickles at random. 

Of course, I just told you the last part of the designing the card! So, I will tell you that I started out by inking my background, using a sponge. I did the sky first, then the sand. I then went back and added dimension to the grass by highlighting it with a marker. 

When I delivered this card and the 2 others to my customer, she was very happy. That, in turn, made me very happy!

I did want to tell you that in yesterday's post, I don't think that I had told you that I had added Stickles to Santa's beard. I don't know if you can tell from my photo. 

I hope that you know that on any of my pictures, you can click on them to make them larger. It may help you with some of the detail. Please give me feedback on the clarity of the photos. If I need to change the way the pictures are taken, please let me know.

Have a great day!
Hugs!
Deb

Saturday, September 22, 2012

Good morning, Faithful Followers!

It's the weekend once again. It's funny how much we rush the weekdays, so that we can get to the weekends, and enjoy life once again! I hope that you have set aside some time for yourself...perhaps crafting time? I have a busy day ahead of me, which includes garage sales, antique mall, Hobby Lobby, and a dinner get together with friends. I can't wait! Since it's not quite 6:00 AM, I have just enough time to do a little sharing with you. :-)

Today I am sharing a tropical Santa Christmas card. It is a card that I made for a dear customer of mine.

I used a gift border punch across the top of my mat. The Santa is Stampin' Up!, as well as the stocking and starfish. They're from the Sunny Seasons Greetings set, which is retired, I believe. The recipient of the card is a lover of beaches, sunsets and tropical things. I tried to incorporate those things into this card. I added a sponged background, and a sun setting. I cut a circle with a punch, then used the "hole part"as a template,  to sponge my sun with several ink colors. I sponged the beach with ink, then added a mixture of sand and some tiny beads. Ribbon was added to the bottom with some embellishments. Finally, I added a punched background with the greeting on the top of it.


I hope you have a wonderful Saturday!

Hugs!
Deb

Tuesday, September 18, 2012

Can you believe that it's September already?!

My grandson Bobby

Good morning, Faithful Followers!
Children love to get in on the act of crafting. Whenever my grandson comes to visit, he loves to go into my studio to check out my supplies and play! From the time he was able to walk, he would always come in and go directly to my punch drawers, which he still does today (He will be 4 in November). It has always been the one place in my room that isn't off limits to him, and he respects that rule.

So, when he or my granddaughter, Ashley come to visit, I love to take them into my room to be creative. They both love to experiment with different tools. The last time that Ashley was here, she made a beautiful scrapbook to commemorate their family trip to Disney. She did an amazing job! She also made thank you notes that were so cute!

Bobby enjoys making things for his mama. So the card above is one that he made for her, using his own ideas and using the tools that he wanted to. don't you love to see children being creative? I think that it's important for us all to nurture that in children.


Like many of you out there, I am addicted to Pinterest! I am trying to use some of what I find. The headband below is an idea that I got from Pinterest. It didn't have any instructions, but was easy to figure out.

Ghost for headband

It's made with simple white ribbon, which I cut into pieces and added a stitch or two to the backside to keep them attached to one another. I added the bow and the googly eyes, attached it to a headband, and VOILA! I had so much fun making it! It definitely got my creative juices flowing, which leads me to my next project that I am sharing with you today.
Ghost headband
 Now that I was feeling creative, I started looking around at potential items to create with! Isn't that how it happens? So, when I went into the refrigerator, I saw my Laughing Cow cheese container and thought, hmm...I bet that I could make something out of that! 
Trinket box

The next thing I knew, I was wrapping ribbon around the outside edges, cutting circles with my Spellbinders for the top, bottom and insides. I found paper in one of my mat stacks to use. I inked the bare edges and added a cross, cut out with Spellbinders. 

I think that it made a cute little trinket box! What do you think?

I hope that you have a wonderful and creative day today! Remember to share creativity with children. It will make their creative juices start to flow!

Hugs!
Deb


Monday, September 10, 2012

A Birthday Card

Hello Faithful Followers!

Today I am sharing a card that I made for my daughter. Her birthday is on 9/11. It's a tough day for our country, but is a special day for our daughter. She loves tropical things, the beach and especially mermaids. So, I chose to make her a mermaid card!

It was a lot of fun working on the "ocean"! I added some sand and glitter with beads to the "ocean floor".  The mermaid has been colored with Copics and then Stickles were used to give her some bling. I hope you like her!

Hugs!
Deb

Sunday, August 26, 2012

Happy Sunday Morning!

Good morning, Faithful Followers!

I am sitting here listening to the crickets chirping outside. It is going to be a busy day today. So, I wanted to be sure that I hopped on here quickly to share a card that I designed for a friend. It's a card for a guy, which is always a challenge! My friend is a fisherman. I had this cute set that I bought from Rubberneckers. I just love it! I stamped on patterned paper that was from a Fishing stack. I inked the images and added brads. I Cuttlebugged the background and matted it too. I thought that it came out cute! Time to get it in the mail!

Front

Inside
Have a wonderful day, whatever you do!

Hugs!
Deb

Wednesday, August 22, 2012

A new day!

Good morning, Faithful Followers!

It's a new day! How can we not love the fact that we awakened this morning and have a new day, when so many don't have that luxury? So, I am going to be thankful and share two new cards with you!

Another Sympathy card

Stampin' Up! Punch Potpourri set


I like to have plenty of sympathy cards on hand. When I make my cards, I leave out the sentiments on the inside, so that I can personalize them. I used my Spellbinders on the first card, then added pearls. The background paper is from a stack.

The second card was made with the same background paper, except that I opted to ink it before adding the stamped image. I really like this set a lot. The bird has a coordinating bird punch. The branches that the bird is sitting on is also on the same punch. LOVE it!

Have a great day, my friends!

Hugs!
Deb

Tuesday, August 21, 2012

Rain & cooler temps are a welcome change!

Good morning, Faithful Followers!

Today I am sharing some sympathy cards with you. I was inspired by my Stampin' Up! stamp club consultant, Karla Saner-Amigh! She's awesome and always makes me want to play more!

I decided to use my Spellbinders to create a card. I really like the look layering the different elements. It's simple, yet elegant, I think.


I used my Cuttlebug to emboss the 
background on 4x4 cardstock. I used a Lacy Square Spellbinders die and stamped my image on it. After adding my image, I used the bleach technique to change the color of the flowers, using a Q-Tip to apply. I added a bit of ribbon from my stash and a button to complete the look. The following card is using the same technique.

  On this card below, I again, used my Cuttlebug to emboss my background on 4x4 cardstock. I then took a Spellbinders cross and cut it out of the center of another Lacy Square Spellbinder. I love the textured look it gives the cross. I added some pearls to give some dimension and interest. I added my verse below. The card below this one is using the same technique, except for adding a few pearls at the bottom, below the verse.


The final card for today is one using a Stampin' Up! set. I just love dandelions that have gone to seed! Like the first cards, I used the bleach technique to accent the flowers. Instead of using a regular ribbon accent, I used a leaf ribbon trim from my stash.

I hope you enjoy my work!

Have a great day!

Hugs!
Deb

Saturday, August 18, 2012

Stay Tuned...

Good morning Faithful Followers!

I just wanted to ask you to please stay tuned. I will not be posting any cards this morning, but hope to tomorrow. It has been a busy week! Yesterday was my last day watching my 1 year old granddaughter, Ava. She will be starting daycare on Monday. :-(  We have 2 showings on our house today, so I don't have time to work on a project to share right now. So, please, stay tuned!

Have a wonderful Saturday!

Hugs!
Deb

Tuesday, August 14, 2012

Finding treasures!

Good Morning Faithful Followers!
Edward & Alice Hofer

Today I have something new to share with you. I have been doing some work with my family genealogy on and off for some time. One day last week, I decided to Google my grandmother's name. I came up with all kinds of things on the web. One link was to a hometown newspaper. It mentioned my family time and time again. I had to laugh as I read many of the mentions. Back in those days, a time without crime like today, news was when family either had family visiting or when they went to visit them...often, just a town away!

As I went through these papers, I came across the treasure above. It is a photo of my great grandparents, my father's grandparents! I was elated to discover it! I printed it out on photo paper so that it can be added to my Heritage album. 

Take a look online and see what you can find! Come back and let me know what buried family treasures you have found.

Have a great day and come back to see more cards in the coming days!

Hugs!
Deb

Wednesday, August 8, 2012

My Studio

Good morning, Faithful Followers!

It's going to be another hot day here in Texas. I am so done with the 100's myself, but Mother Nature disagrees!

Today I decided to share some pictures of my scrapbook/cardmaking studio. I probably should have  cleaned it up more for you, but, it is what it is! I had my granddaughter here when I was taking some of the pics. So, there are a few toys and a box on the floor! Let me know what you think (Not of the mess! LOL). I hope you like it!


Have a great day!
Hugs!
Deb


Tuesday, August 7, 2012

Another early morning!

Good morning, Faithful Followers!

I woke up this morning at 4:30 feeling rested. I never understand that when I have only had 6 hours of sleep. I'm sure that it will catch up with me later, most likely as I am sitting in the chair at the hairdresser!

This morning I would like to share 3 cards with you. The first is a card that I made for a woman who is 90 years young! I stamped my image from TPC Studio, then cut it out. I had a mat stack in my stash that had a sheet with butterflies on it, which I mounted. I added some dimension to it with some Diamond Glaze. I added some lace from my stash, and finished it off with some Thickers numbers. The recipient really love the card.

This card started out different than it began! I'm sure that anyone reading this, who is a cardmaker, understands that statement! I used a Spellbinder die to cut out the front of my card. I thought that having the image on the inside, showing through the front, would give it a different look. So, I stamped my Stampin' Up! image inside, and colored it with Copics. I decided that she really needed the sun behind her, so I added the sun by making my own template. I inked the background. 

The front of the card with the Very Vanilla Stampin' Up! card stock looked so plain. So, I decided to use the same die and cut out another piece of card stock (K&Company Travel)  to overlay the front of the card. It really finished it off!

My final card for today is one that I am still unsure as to whether I like it or not! LOL!

I stamped my image (Stampin' Up!) and embossed it. I had some butterflies that are dimensional, from K&Company. After attaching the butterfly, I found a piece of card stock from a mat stack that matched the little bit of peachy color on the butterfly. I punched the edges with a Martha Stewart punch, and mounted it on Stampin' Up! card stock.

I am missing my grandchildren! I can't wait for them to come home from their vacation!

I hope you have a wonderful day!

Hugs!
Deb

Monday, August 6, 2012

Good Morning, Faithful Followers!

Good morning, Faithful Followers!
It's Monday morning and the first day of my week off from watching my granddaughter, Ava. I am missing she, her brother, Bobby and their Mama already. I will miss that smiling happy one year old toddling into my house each morning, happy to see me! I have lots of plans this week and one of them is to update my blog!

The first card above, is a simple bowling card. I had a little fun with it. You can't see in the picture, but, I added little dots to the brads at the top, to make them look like bowling balls too. Everything on this card was from my stash.

I had so much fun creating this card! As I'm sure you can tell, I used my Cricut to create this card. I also used my Cuttlebug for the background, as well as Spellbinders to cut out my greeting.

I went to the stamp convention in Grapevine, TX this year, and discovered a stamp company that I was unfamiliar with. They are called Rubbernecker. I just LOVE them. They have a wonderful variety of stamps at very reasonable prices. Many are singular stamps too, which is great for your budget. The above card was made with one of their stamps. I thought that it was both fun and appropriate to make for my husband, who refers to himself as "The Big Kahuna"! He loved the card. I added Stickles to the teeth to give a little shine. I colored this image with my Copics. I sponged the edges to highlight.

 Here's another fun card made with my Cricut. I love Monsters Inc.
and Mike is one of the cutest! I made this for a dear friend's grandson. The punch I used for the greeting is a Stampin' Up! punch.

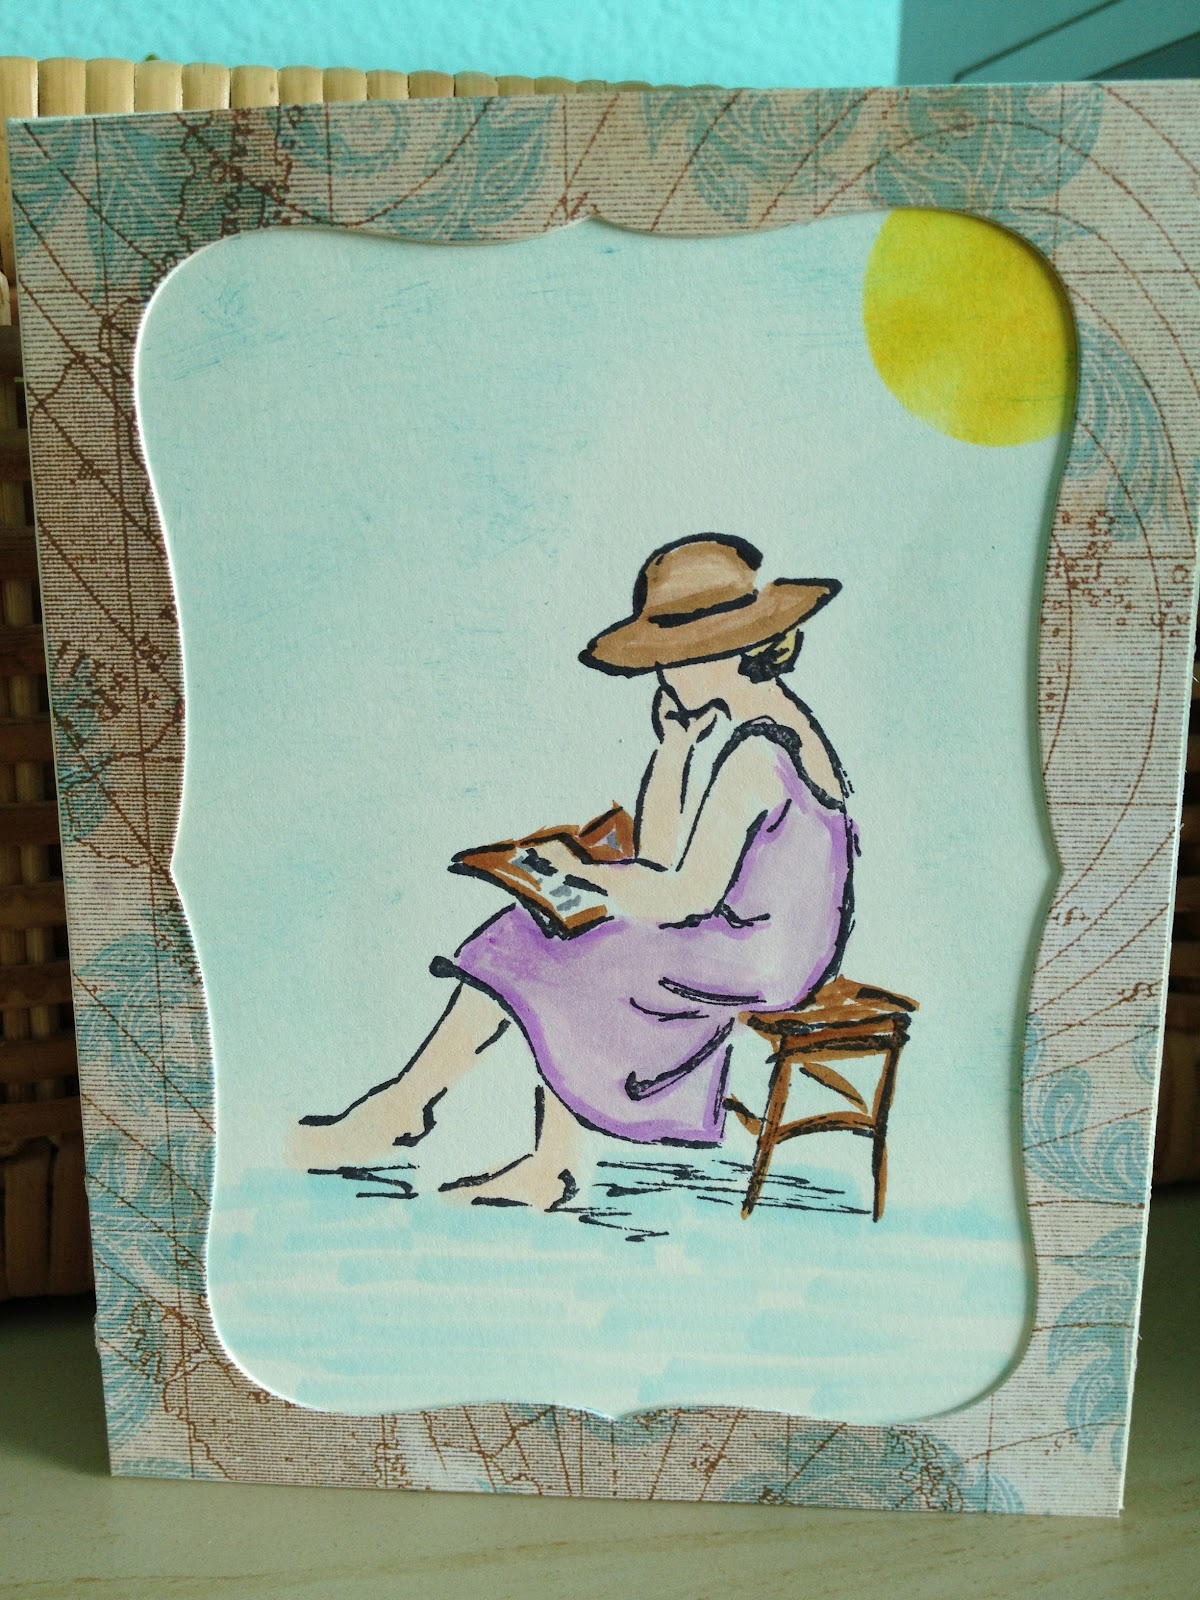
This card above was made for a very dear and special lady. I wanted to have an old fashioned look to the card, so I added lace from my stash, as well as a nice old button, to give it interest and dimension. The 80 is from Thickers. 
I try to keep Sympathy cards on hand, and love this image from Stampin' Up! for my cards. I used an embossing folder for my background and added some pearls. I like to add personalized greetings inside of my cards, and often prefer to print out poems that I write or find, and other inspirational words to make them my own.

I hope that you have a wonderful day!

Hugs!
Deb

Sunday, August 5, 2012


These are quick thank you cards that I made for my daughter to send for my granddaughter's first birthday gifts. They were fast and easy to make...fun too! I used double sided card stock (Cut out with Spellbinders), added ribbon as a handle, punched and inked hearts, added a little bling, and finally the "thanks"! I was happy with how they came out, and made the whole bunch in about 3 hours!